How to Plan a Space-Efficient Home Strength Training Setup
Square footage is the most expensive part of any home gym. A spare bedroom or a corner of a garage comes with a rent or mortgage cost, as well as the opportunity cost of using that area for literally anything else. Limited space can also create practical barriers to regular training. If setting up to lift feels like moving furniture every time, the workout is easier to skip, while a space-efficient setup makes getting started much less of a chore.
This guide treats floor space as a budget you’re spending rather than a given. Every piece of equipment has to earn its footprint and fit the way the room is used outside training hours. Some things justify permanent floor space. Most things don’t, so they should fold, stack, or hang instead.
Measure the room before you shop for anything
Most small-home-gym mistakes aren’t about buying too much gear. They’re about buying gear that technically fits the room but doesn’t fit once you try to move around it, load it, or complete an exercise safely.
Before you look at a single product listing, get a tape measure and write down the usable floor footprint, meaning the space that’s actually clear of furniture, doors, and walkways, along with the ceiling height and the swing clearance around anything that opens, folds, or racks a barbell. Ceiling height matters more than many people expect because overhead presses, pull-ups, and even racking a barbell near the top of a rack all use vertical space you might not have accounted for. A rack that fits according to its basic dimensions can still conflict with a ceiling fan, light fitting, garage door mechanism, or sloped ceiling in an attic conversion.
Door and wall clearance matters just as much. If a rack needs swing room to fold out, space for loading plates, or clearance for safety equipment, those requirements have to fit within the usable area rather than the room’s total dimensions. You need enough room to operate the equipment as intended, not merely enough room to stand it against a wall. Measure twice. Buy once. This is the step many people skip, and it’s often the reason a promising garage or spare-room gym plan becomes awkward to use during the first week.
Grade every purchase on footprint-to-function
Once you know your measurements, use a simple filter for every purchase: what does this piece of equipment let you do per square foot it occupies, both during a workout and for the rest of the day?
A flat bench that stores upright against a wall scores high because it gives you a full pressing station and then gives the floor back. A single kettlebell scores high too, supporting swings, presses, carries, and get-ups from one compact shape that can tuck into a corner. Adjustable dumbbells also score extremely well on this measure because one pair can replace an entire rack of fixed-weight dumbbells that would otherwise take up much of a wall.
Now compare that with equipment that sits in the middle of the room and rarely moves. A flat bench that’s too heavy or awkward to lift easily and gets left out because it’s a hassle to move isn’t really saving space. It’s occupying the room passively, including on days when nobody trains. The footprint-to-function test considers more than how useful a piece of equipment is in isolation. It asks whether that equipment earns the floor space it takes up every day, including the many hours when it isn’t being used.
Power rack vs. folding rack: the decision that shapes everything else
The rack is the purchase that anchors the rest of a barbell setup, and it’s also one of the easiest items to get wrong in a shared-use room.
A traditional power rack or power cage is a standard choice for barbell training. It provides a stable structure for squatting, benching, and racking a bar at different heights, provided the rack, attachments, and safety equipment are appropriate for the intended loads. It also occupies a substantial area of floor permanently, with additional working room needed to move around the rack and load or unload plates. In a dedicated garage gym, that may be a reasonable trade-off because you’re not trying to reclaim the same space for another purpose between sessions.
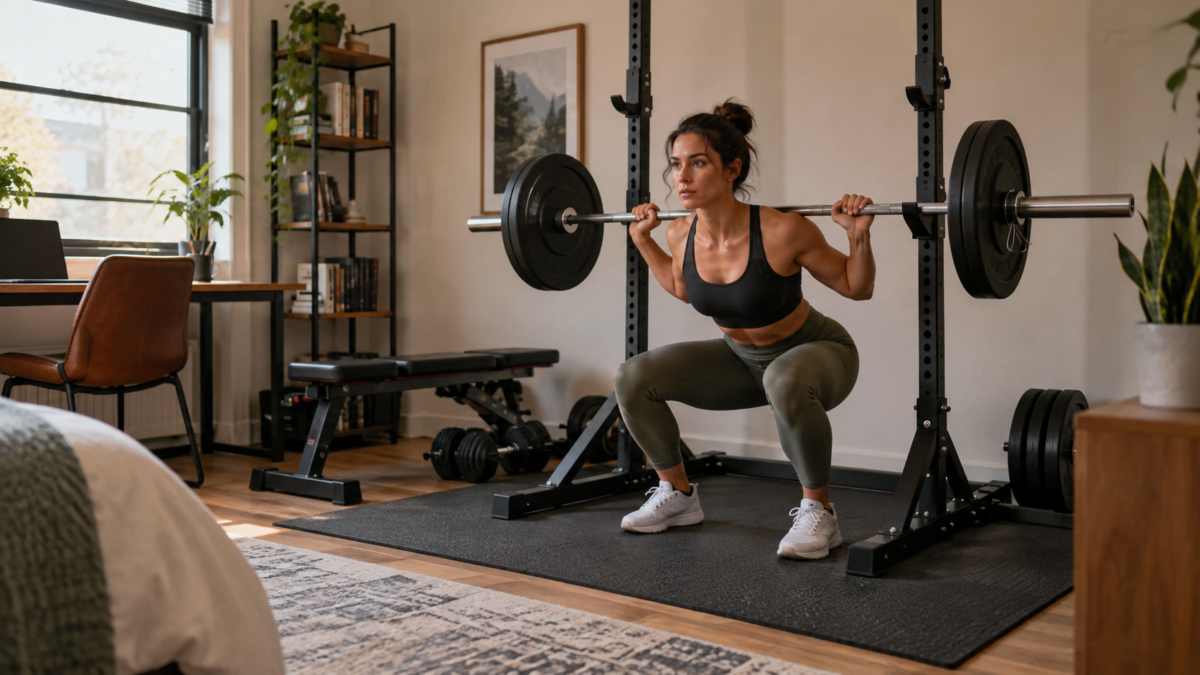
In a spare bedroom, a home office corner, or an apartment living room, that footprint becomes harder to justify during the other hours of the day. A freestanding folding rack may offer a more practical use of the available area because it can be folded down and stored when training is finished, without requiring permanent wall mounting. For a room that doubles as an office, a nursery, or a place guests need to walk through, one example to assess is a folding squat rack. Evaluate it against your measurements, the manufacturer’s stated dimensions and load rating, the space required to unfold and use it safely, and any compatible safety equipment before deciding whether it suits the room and your training.
Portability and setup are important parts of that decision. A freestanding folding rack should be opened, positioned, and used according to the manufacturer’s directions on a suitable, level surface with enough clearance for the barbell, plates, and planned safety equipment. Check the rack’s stated dimensions, load limits, locking or stabilising features, and compatible accessories before you commit. Saving floor space isn’t worthwhile if the setup or surrounding clearance is unsuitable for safe use.
Solve the loading question without covering the floor in plates
Barbell plates are a quiet space-killer in small setups. Several plates stacked flat on the floor can take up more usable room than expected, while loose plates also create obstacles in a room that serves more than one purpose.
If you’re committed to barbell training, plan plate storage as part of the rack purchase rather than treating it as an afterthought. Rack-mounted storage pegs, where compatible with the rack and its use, or a slim vertical plate tree can keep plates together and closer to the wall instead of spread across the walking path. If your chosen rack doesn’t include suitable storage, a properly installed wall-mounted plate holder may address the same issue while preserving more usable floor space.
If you’re not attached to barbell work specifically, you can avoid the plate-storage question altogether. Adjustable dumbbells cover a broad range of pressing, rowing, and single-limb work while taking up much less room than a set of fixed-weight pairs. Add resistance bands, which can store flat in a drawer or hang from a wall hook, and you have another way to apply progressive or variable resistance without claiming permanent floor space. A compatible landmine attachment is another option worth considering for an existing barbell setup because it supports presses, rows, and hinge patterns from a fixed pivot point, although it still requires enough working clearance for the bar’s movement.
Protect the floor and keep the noise down
Rubber flooring is worth planning for in a space-efficient setup. It can help protect the subfloor from weights, provide a more stable training surface, and dampen some impact noise, although the result will depend on the flooring, building structure, equipment, and way you train.
Interlocking rubber tiles or stall mats are common choices. They cost less than many larger pieces of gym equipment, and removable sections can be useful for renters or anyone using a room that has to return to another purpose after training. Lay them out to define the workout zone, then stack or roll removable flooring away if the room needs to function as a bedroom or office again shortly afterward.
Use the vertical space you’re already paying for
Every small room has one dimension that’s usually underused: the wall from floor to ceiling. Pegboards, wall shelves, and high hooks can turn that vertical area into storage while leaving more of the floor available for movement and training.
Bands can hang on a hook. Kettlebells can sit on a suitable low shelf outside the walking path. A pull-up bar may mount in a doorway or integrate into a compatible rack, using height rather than claiming another permanent section of floor. Even a single shelf above the rack can hold a foam roller, jump rope, and lifting belt that might otherwise end up in a pile on the ground. The rule is straightforward: nothing should live on the floor unless it needs to be there while you’re training or is too heavy to store safely elsewhere.
Don’t sacrifice progression for compactness
A common worry with small-footprint setups is that they cap out too quickly. That doesn’t have to happen when equipment choices account for progression from the start.
Progressive overload doesn’t require a wall covered with fixed-weight plates. Adjustable dumbbells and a rack used with an appropriate selection of plates can support a wide range of strength levels through gradual load increases. Bands provide resistance that changes through the range of motion, offering a different challenge from straight weight. Load isn’t the only variable available either: unilateral work, split squats, single-arm presses, tempo changes, and paused reps can make a manageable weight considerably harder without adding more equipment or taking another inch of permanent floor space. Bodyweight movements such as push-ups, dips performed with suitable equipment, and pistol squat progressions can fill gaps on days when you don’t want to set up the full training area.
A five-minute setup and tear-down routine
The point of this approach is that the room can return to being a bedroom, office, or living room within a few minutes rather than remaining a permanent gym by default.
A workable routine might look like this: unfold and position the rack according to its instructions, lay out the rubber flooring, and move the bench into position. Train. Then reverse the process, making sure everything is secure before storage. Fold and store the rack as directed, put away the flooring, return the bench to its storage position, and hang bands or other accessories back on their designated hooks. The transition stays simple enough that setting up and packing away are less likely to become reasons for skipping a planned session.
Rooms that become permanent, cluttered gym corners are often the ones where storage was treated as a problem for later. When every item has a practical storage position and the clear-up process is built into the plan from day one, the room remains usable for everything else it needs to do.
A small room doesn’t have to mean a limited training programme. It means every piece of equipment must justify the space it takes, with folding, hanging, and stackable options generally earning their place more readily than equipment that occupies the floor around the clock.